Automatic FAC Testing System

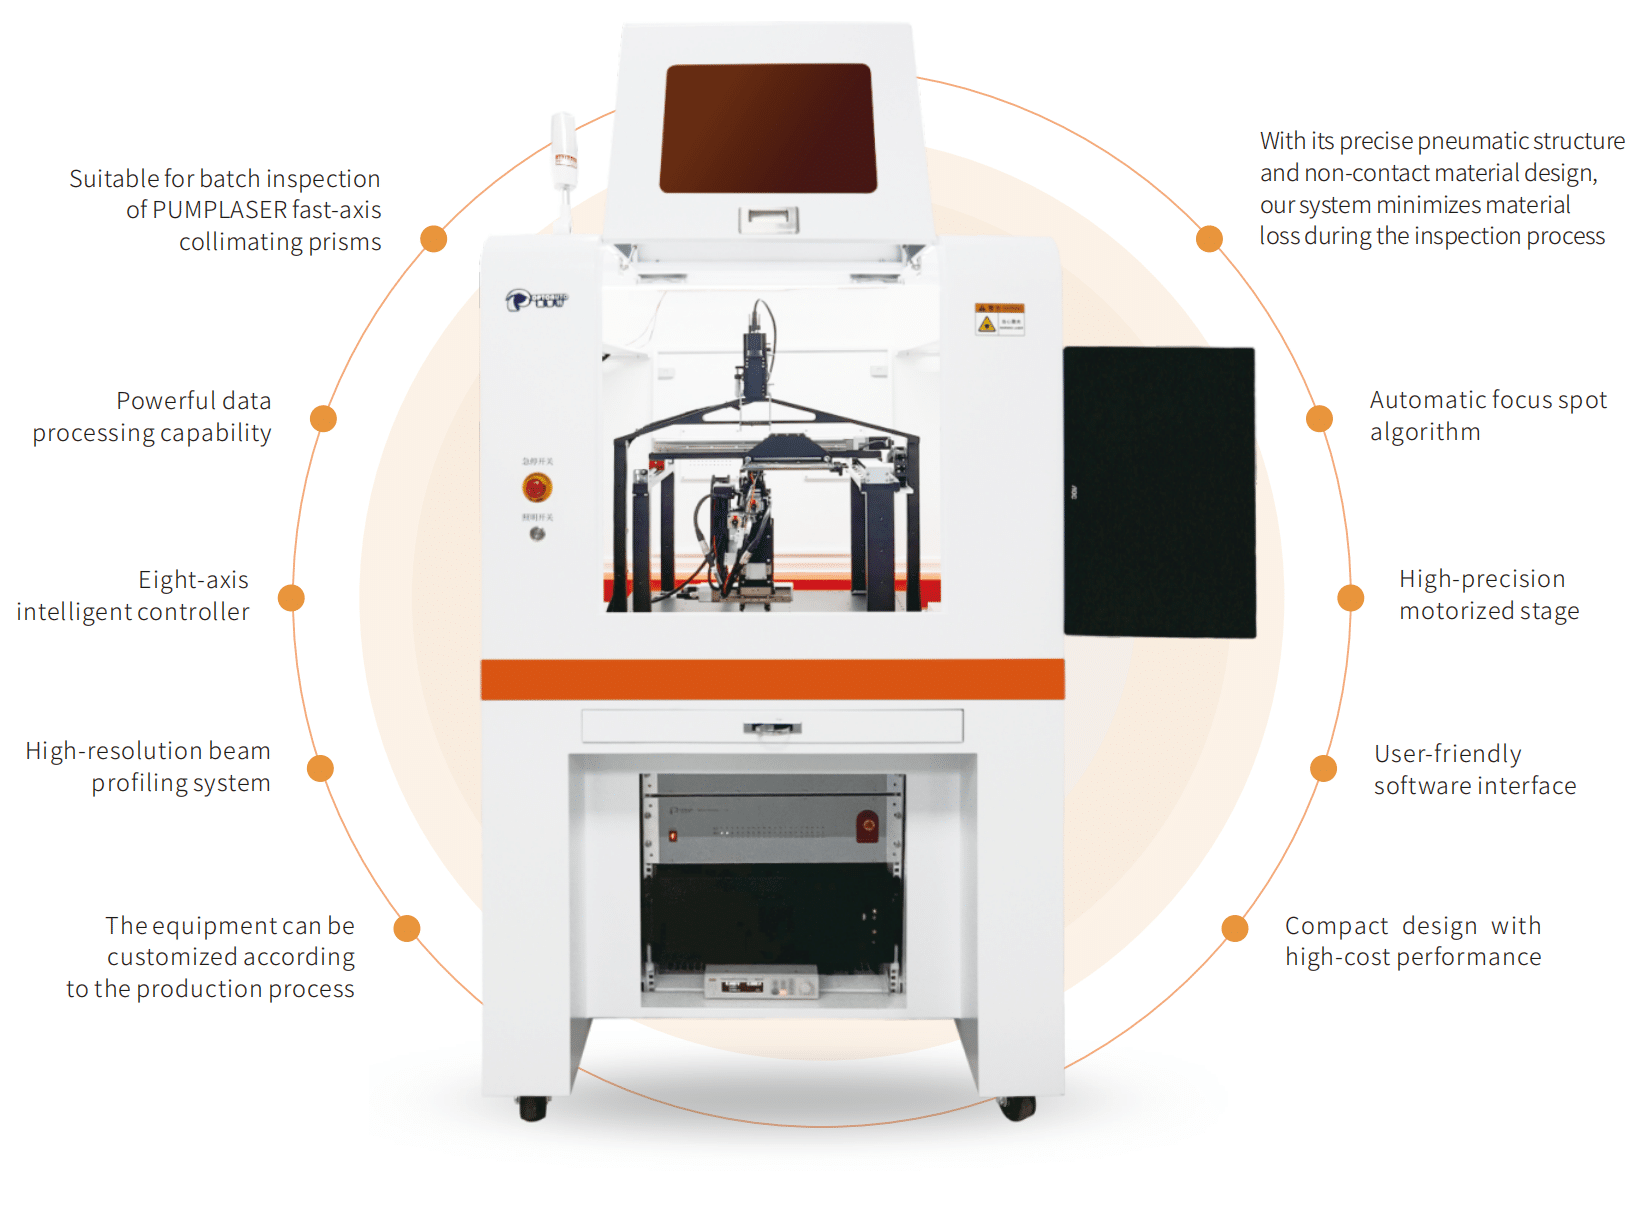
Our company’s independently developed Automatic FAC Testing System(Model: OA6000-FACT) is designed for the automatic quality inspection of the fast-axis collimating mirrors for pump source lasers. The system features automatic alignment, automatic light detection, automatic data saving, automatic alarm functions and etc.
Equipped with multi-axis motion control modules and professional industrial camera image acquisition modules, our system can simultaneously inspect multiple fast-axis collimating mirrors, providing greater efficiency and data traceability than manual inspection processes.

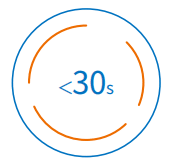
Testing time (average time for single point detection)
| Name | Automatic FAC Testing System |
| Model | OA6000-FACT |
| Pressure range | 0.6 ± 0.1 MPa |
| Rated voltage | 220V / 16A |
| Rated Power | 1.8 KW |
| Power supply | (198~242) VAC,50Hz |
| Vacuum source | -0.07Mpa |
| Network | Cat5/6 |
| Outline dimension | W800xD1000xH1685mm (excluding the expanded portion of the observation window and the display) |
| Weight | 190kg |
| Operating environment | Avoid high temperatures and ensure good lighting in the working area Do not expose the equipment to moisture and do not use it in workshops without adequate rain protection measures For indoor use only |
| Equipment structural requirements | The equipment’s structural layout should be reasonable, with no interference between modules, and with sufficient clearance |
| Other requirements | ① The equipment’s design and manufacturing should feature advanced mechanical structure, process manufacturing, control systems, and user-friendly design, while ensuring safe operation ② The necessary standard configuration for the equipment’s normal use must be complete and matching, including all corresponding accessories, cables, tools, and spare parts |

| S/N | Name | Remarks |
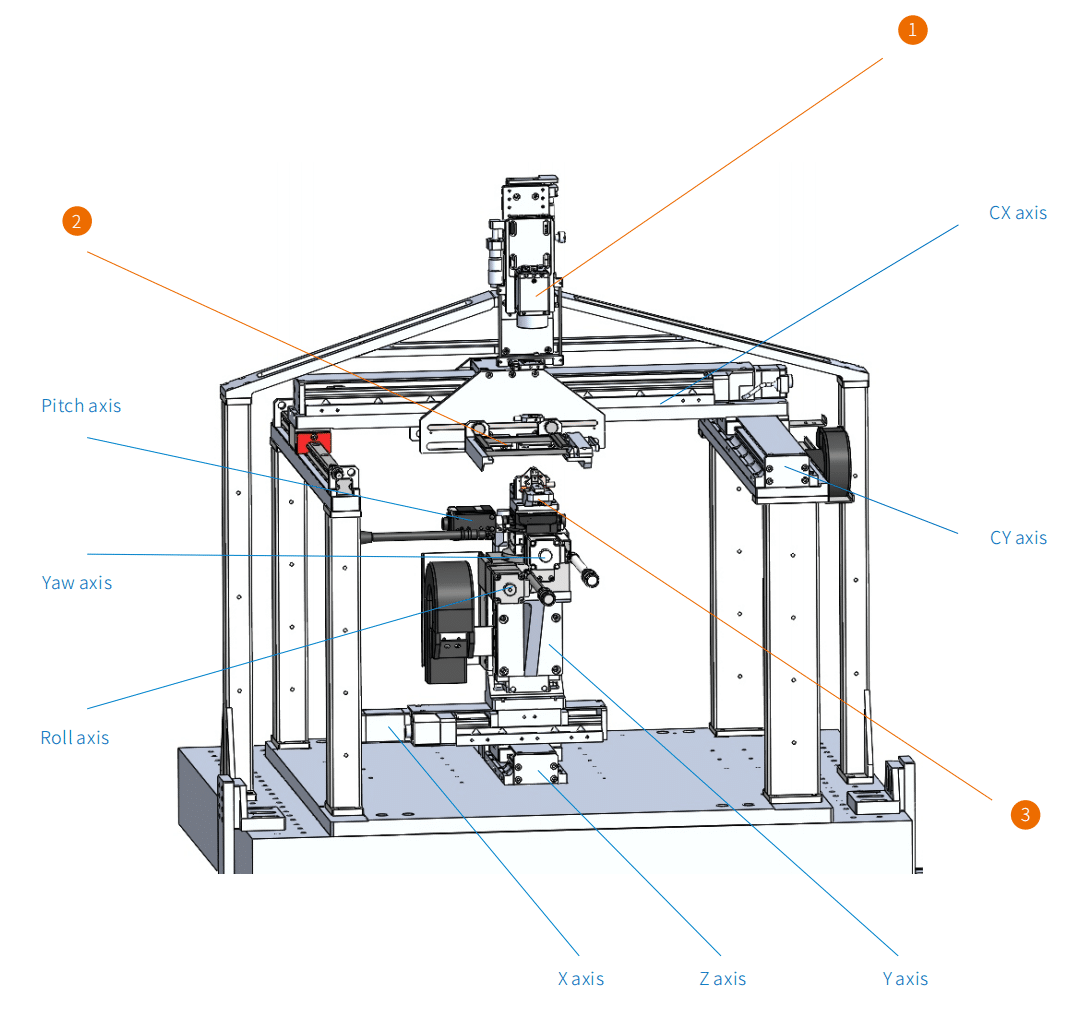
| 1 | Spot Profiler | Reading the optical characteristics of the beam spot, fine-tuning of COS chips and FAC lenses |
| 2 | FAC material tray | Pre-positioning of the FAC lenses to be tested |
| 3 | Power-on section | The COS power-on device has a flexible mechanical structure, which allows for convenient and rapid replacement of chips |
| 4 | X axis | Travel: 50mm Resolution: {Full/Half: 2μm/1μm, Microstep (1/20 Microstepping) 0.1μm} |
| 5 | Y axis | Travel: 50mm Resolution: {Full/Half: 2μm/1μm, Microstep (1/20 Microstepping) 0.1μm} |
| 6 | Z axis | Travel: 30mm Resolution: {Full/Half: 2μm/1μm, Microstep (1/20 Microstepping) 0.1μm} |
| 7 | CX axis | Travel: 300mm Resolution: {Full/Half: 4μm/2μm, Microstep (1/20 Microstepping) 0.2μm} |
| 8 | CY axis | Travel: 300mm Resolution: {Full/Half: 4μm/2μm, Microstep (1/20 Microstepping) 0.2μm} |
| 9 | Yaw axis | Travel: ±6°, Repeated positioning accuracy: within ±0.005° |
| 10 | Pitch axis | Travel: ±6°, Repeated positioning accuracy: ±0.005° |
| 11 | Roll axis | Travel: ±6°, Repeated positioning accuracy: within ±0.005° |

